
When the summer sun blazes down and temperatures soar, there’s nothing quite like the comforting embrace of cool air wafting through your home. If you’ve made the savvy choice to install a mini split AC unit, you’re already on your way to beating the heat with style and efficiency. But hold on—before you simply plop that sleek unit on any old wall, let’s chat about how to size and position it like a pro. After all, proper installation is the secret sauce for achieving optimal cooling efficiency and ensuring you enjoy a refreshing breeze where and when you need it most. So, grab a cool drink, settle in, and let’s dive into the delightful world of mini split air conditioning! Your future self will thank you when you’re lounging in perfectly cooled comfort all summer long.
Mastering Mini Split Placement for Peak Performance
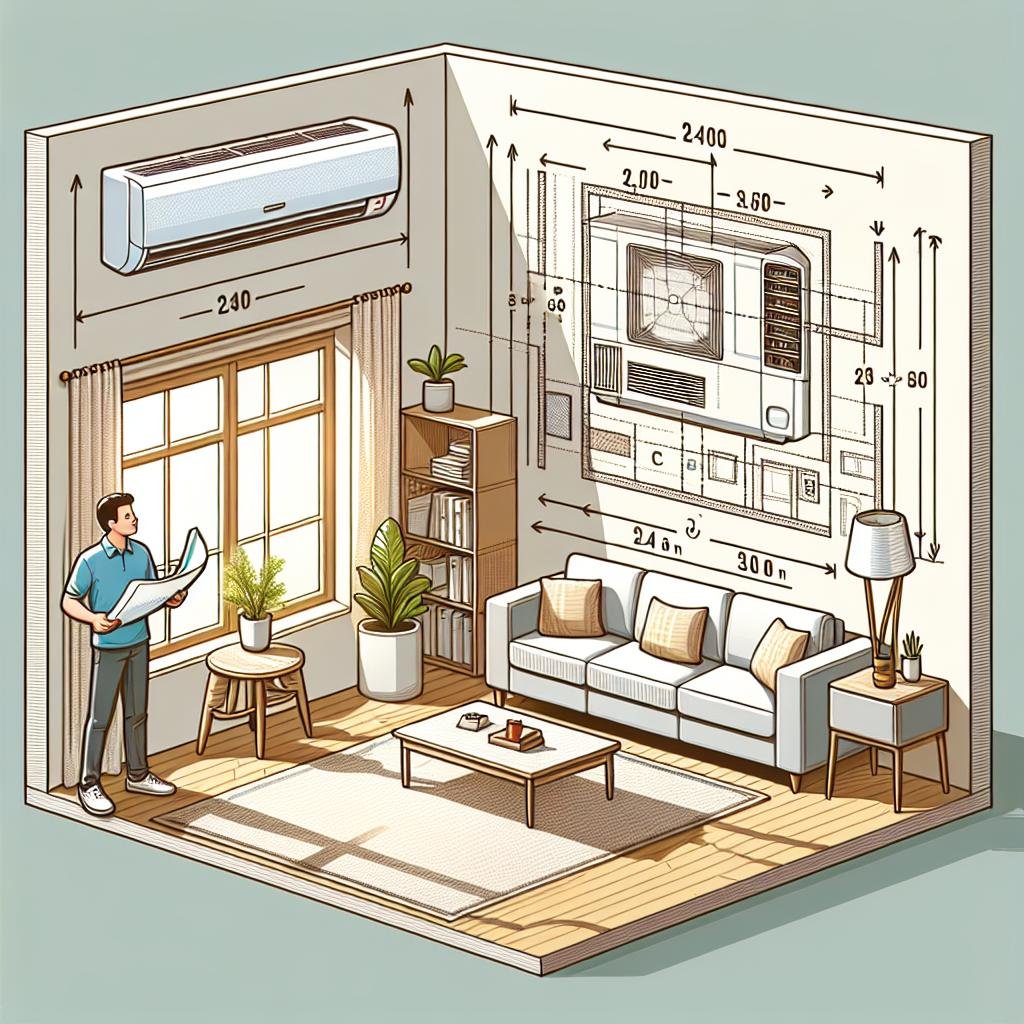
When it comes to achieving optimal cooling efficiency with your Mini Split AC unit, placement is just as crucial as sizing. Ensure that the indoor unit is positioned in a central location within the room. This facilitates even air distribution, allowing the cool air to circulate without obstruction. Some important placement tips include:
- Avoid corners: Keep the unit away from corners or areas blocked by walls or furniture.
- Height Matters: Install the unit approximately 7 to 8 feet above the floor for the best airflow.
- Consider airflow: Ensure that the airflow is unobstructed by obstacles like curtains or large furniture.
Your outdoor unit also plays a pivotal role in the system’s performance. Proper positioning here is essential for maximizing efficiency and longevity. Make sure to consider the following when selecting a spot for your outdoor unit:
- Shade and Sunlight: Place the unit in a shaded area to prevent it from working overtime during hot summer days.
- Venting Space: Provide ample space around the outdoor unit for ventilation; ideally, maintain a gap of 12 to 24 inches from walls or vegetation.
- Accessibility: Ensure that the unit is easily accessible for maintenance and servicing.
Understanding Room Dimensions and Cooling Capacity
When it comes to finding the perfect fit for your Mini Split AC unit, understanding your room’s dimensions is crucial. The cooling capacity of an air conditioning unit is measured in British Thermal Units (BTUs), which indicates how much heat the unit can remove from a room per hour. To choose the right size, consider the following factors:
- Room Size: Measure the length and width of the room to determine the total square footage.
- Ceiling Height: Higher ceilings require additional cooling power, so take this into account when calculating BTUs.
- Sunlight Exposure: Rooms with ample sunlight may need extra cooling capacity, while shaded areas can often operate with less.
- Occupancy: More people in a room generate additional heat, which can affect your cooling needs.
To help simplify the sizing process, here’s a handy reference table that correlates room size with appropriate BTU ratings:
| Room Size (sq. ft.) | Recommended BTUs |
|---|---|
| 100 - 300 | 5,000 - 7,000 |
| 300 – 500 | 8,000 – 12,000 |
| 500 – 1,000 | 13,000 – 18,000 |
| 1,000 – 1,500 | 19,000 – 24,000 |
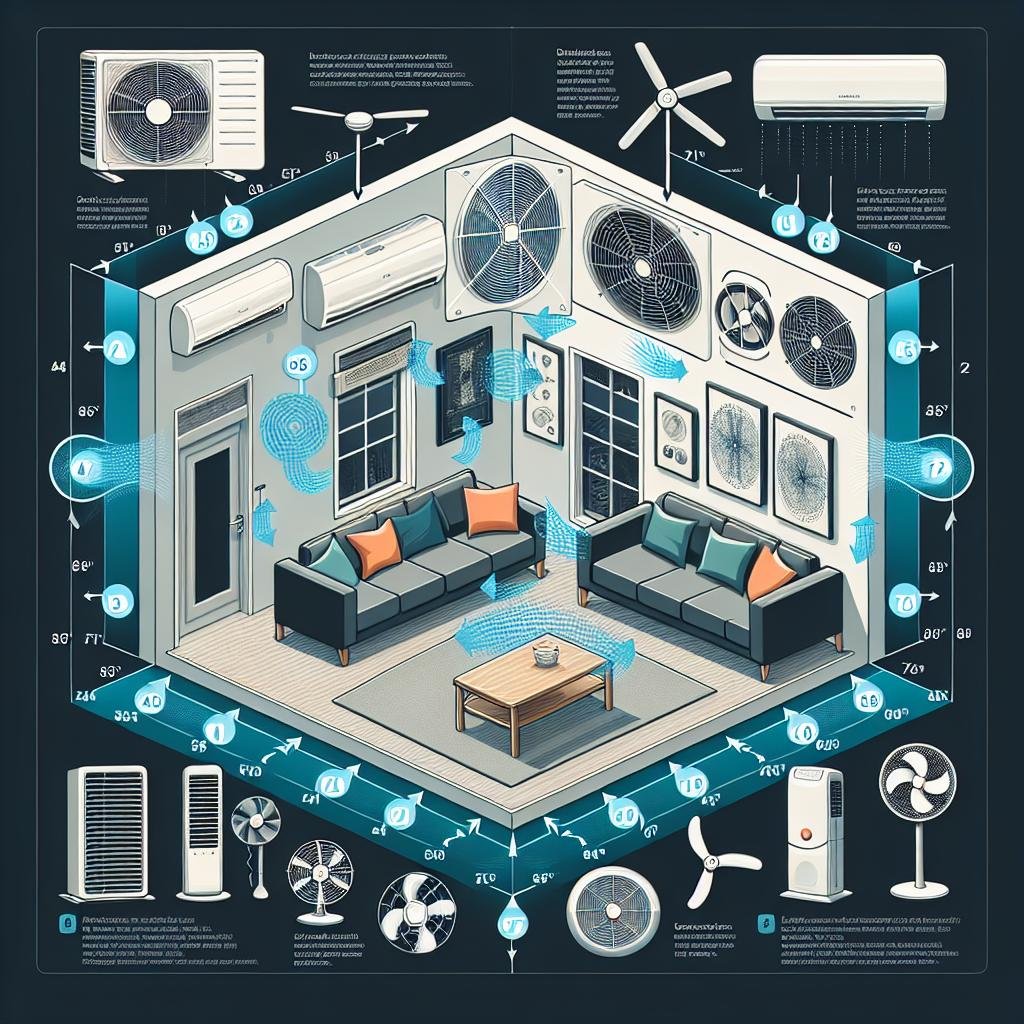
Additionally, proper positioning plays a significant role in maximizing cooling efficiency. Place the unit in an area that allows for optimal airflow and minimal obstruction. Aim for a location that:
- Allows Air Flow: Ensure vents are not obstructed by furniture or curtains.
- Balancing the Air: Position the unit to achieve even distribution across the room.
- Height Matters: For wall-mounted units, install 6 to 8 feet off the ground for optimal performance.
Taking into account room size and cooling capacity, as well as the placement of your Mini Split AC unit, will ensure you enjoy a comfortably cool environment, no matter the temperature outside!
Ideal Mounting Heights for Maximum Airflow
When considering your mini split AC unit’s mounting height, achieving optimal airflow is crucial for effective cooling. A general guideline suggests that the indoor unit should be mounted 7 to 8 feet off the ground. This height allows the cool air to circulate efficiently throughout the room. Air naturally rises, so positioning the unit too low can disrupt airflow patterns, leading to uneven cooling and wasted energy. Therefore, selecting a spot that promotes unobstructed circulation is essential.
To enhance the performance of your mini split system, ensure that the following factors are considered when deciding on the installation height:
- Proximity to Ceiling: Maintain a distance that allows the air to flow freely without hitting the ceiling, which can cause stale air pockets.
- Clear Walls: Avoid installing near obstacles like furniture or decor that could restrict airflow, which diminishes cooling efficiency.
- Height Variation: Consider the height of the occupants in the room; balance the unit’s position to ensure that the cooled air reaches everyone comfortably.
For a more visual representation of ideal mounting heights and their advantages, consider the following table:
| Mounting Height (Feet) | Airflow Characteristics |
|---|---|
| 5-6 | Restricted airflow, potential hot spots. |
| 7-8 | Optimal circulation, even cooling. |
| 9+ | May create cold zones; less effective cooling. |
By adhering to these best practices for mounting height, you’ll help ensure that your mini split AC unit operates at its best, delivering consistent comfort and energy efficiency to your space.
Strategic Location Choices to Enhance Efficiency
When it comes to your mini split AC unit, choosing the right location is crucial for achieving optimal cooling efficiency. First and foremost, consider placing the indoor unit in a spot that allows for even air distribution throughout the room. Look for locations such as:
- Central Walls: Positions on walls that allow airflow across the entire room.
- Away from Obstructions: Ensure that furniture or curtains don’t block the airflow.
- Near Heat Sources: Avoid placing units too close to heat-producing appliances to prevent competing temperatures.
Next, evaluate the outdoor unit’s position as it plays a pivotal role in efficiency as well. To make the most out of your mini split system, keep the outdoor unit:
- Elevated: Place it off the ground to promote better airflow and reduce the risk of water damage.
- In a Shaded Area: Protect it from direct sunlight to minimize energy consumption.
- Clear of Debris: Maintain a few feet of clearance from any vegetation or objects to enhance airflow.
Below is a simple table summarizing the best practices for indoor and outdoor unit placement:
| Location | Indoor Unit | Outdoor Unit |
|---|---|---|
| Best Position | Central walls for airflow | Elevated for airflow |
| Considerations | Away from obstructions | Shaded area for efficiency |
| Maintenance | No furniture blocking | Clear from debris |
Q&A
Q&A: How to Properly Size and Position Your Mini Split AC Unit for Optimal Cooling Efficiency
Q: Why is sizing my Mini Split AC unit correctly so important?
A: Great question! Think of your Mini Split as the bodyguard of your home’s comfort—too small, and it’s overworked and ineffective; too big, and it cools your space too quickly without properly dehumidifying. Optimal sizing ensures your AC runs efficiently, saving you money and energy while keeping your space perfectly chilled!
Q: How do I determine the right size for my Mini Split AC?
A: To choose the right size, you’ll want to consider the square footage of the room, ceiling height, insulation quality, and the number of windows. A general rule of thumb is that you need about 20 British Thermal Units (BTUs) per square foot. For precise calculations, you can consult with a professional or use an online BTU calculator.
Q: What’s the best way to position my Mini Split AC unit?
A: Positioning is key, my friend! You want to install the indoor unit high on a wall, ideally in a central location to allow for even airflow. Avoid placing it near heat sources or corners, as this can hinder its cooling—and let’s face it, no one wants a lukewarm breeze interrupting their summer vibe!
Q: Can I install the Mini Split AC unit myself?
A: While DIY projects can be fun, we suggest leaving the installation to the pros—especially if the thought of handling refrigerant makes you a bit squeamish. A professional will ensure proper sizing, installation, and efficiency. Plus, most manufacturers’ warranties require it!
Q: How can I optimize the airflow from my Mini Split unit?
A: Ah, the power of airflow! Make sure to keep the area around your indoor unit clear of obstacles. Decor, furniture, or even curtains can block the air and reduce efficiency. Additionally, using the remote to adjust the vertical and horizontal louvres can help direct cool air where you need it most!
Q: Is it worth investing in multiple units for larger spaces?
A: Absolutely! For larger rooms or multi-story homes, multiple Mini Splits can be a gamechanger. This setup allows you to control the temperature in different zones, ensuring every nook and cranny of your home is as cool and comfy as you want it to be—no more fighting over the thermostat!
Q: How often should I maintain my Mini Split AC unit?
A: Consistency is key! Clean or replace the filters every 1-2 months. Schedule professional maintenance at least once a year to keep everything running smoothly. A little TLC for your AC means better efficiency and a longer lifespan—just like us, it needs a little pampering!
Q: What other tips do you have for maximizing my Mini Split AC’s efficiency?
A: Glad you asked! Make use of curtains or blinds to block out the sun during peak hours, and don’t forget to seal any gaps around doors and windows to keep that cool air inside. Lastly, consider using a programmable thermostat; it’ll help you save energy while keeping your space just the way you like it!
Q: Any last words of wisdom?
A: Only that you’re now armed with the knowledge for a happy, cool space! Treat your Mini Split like the trusty sidekick it is, and you’ll enjoy excellent performance and comfort all summer long. Happy cooling! ❄️
To Wrap It Up
As we wrap up our journey through the world of mini split AC units, we hope you’ve found valuable insights that will help you beat the heat in style! Proper sizing and positioning can make all the difference in achieving that perfect cool oasis in your home. Remember, just like your favorite puzzle piece, every unit has its unique place that unlocks its full potential.
As you plan your installation, don’t hesitate to reach out to professionals for expert advice, and keep the tips we’ve shared in mind. Whether you’re windswept by summer breezes or cozying up during winter’s chill, a well-placed mini split will ensure your comfort all year round. So, roll up your sleeves, get ready to measure, and let the cooling commence—your home deserves it!
Thanks for joining us on this refreshing adventure, and here’s to many cool days ahead!